
/ KNOWLEDGE · PROCESS
Injection pressure — the number on the gauge is not the number in your part
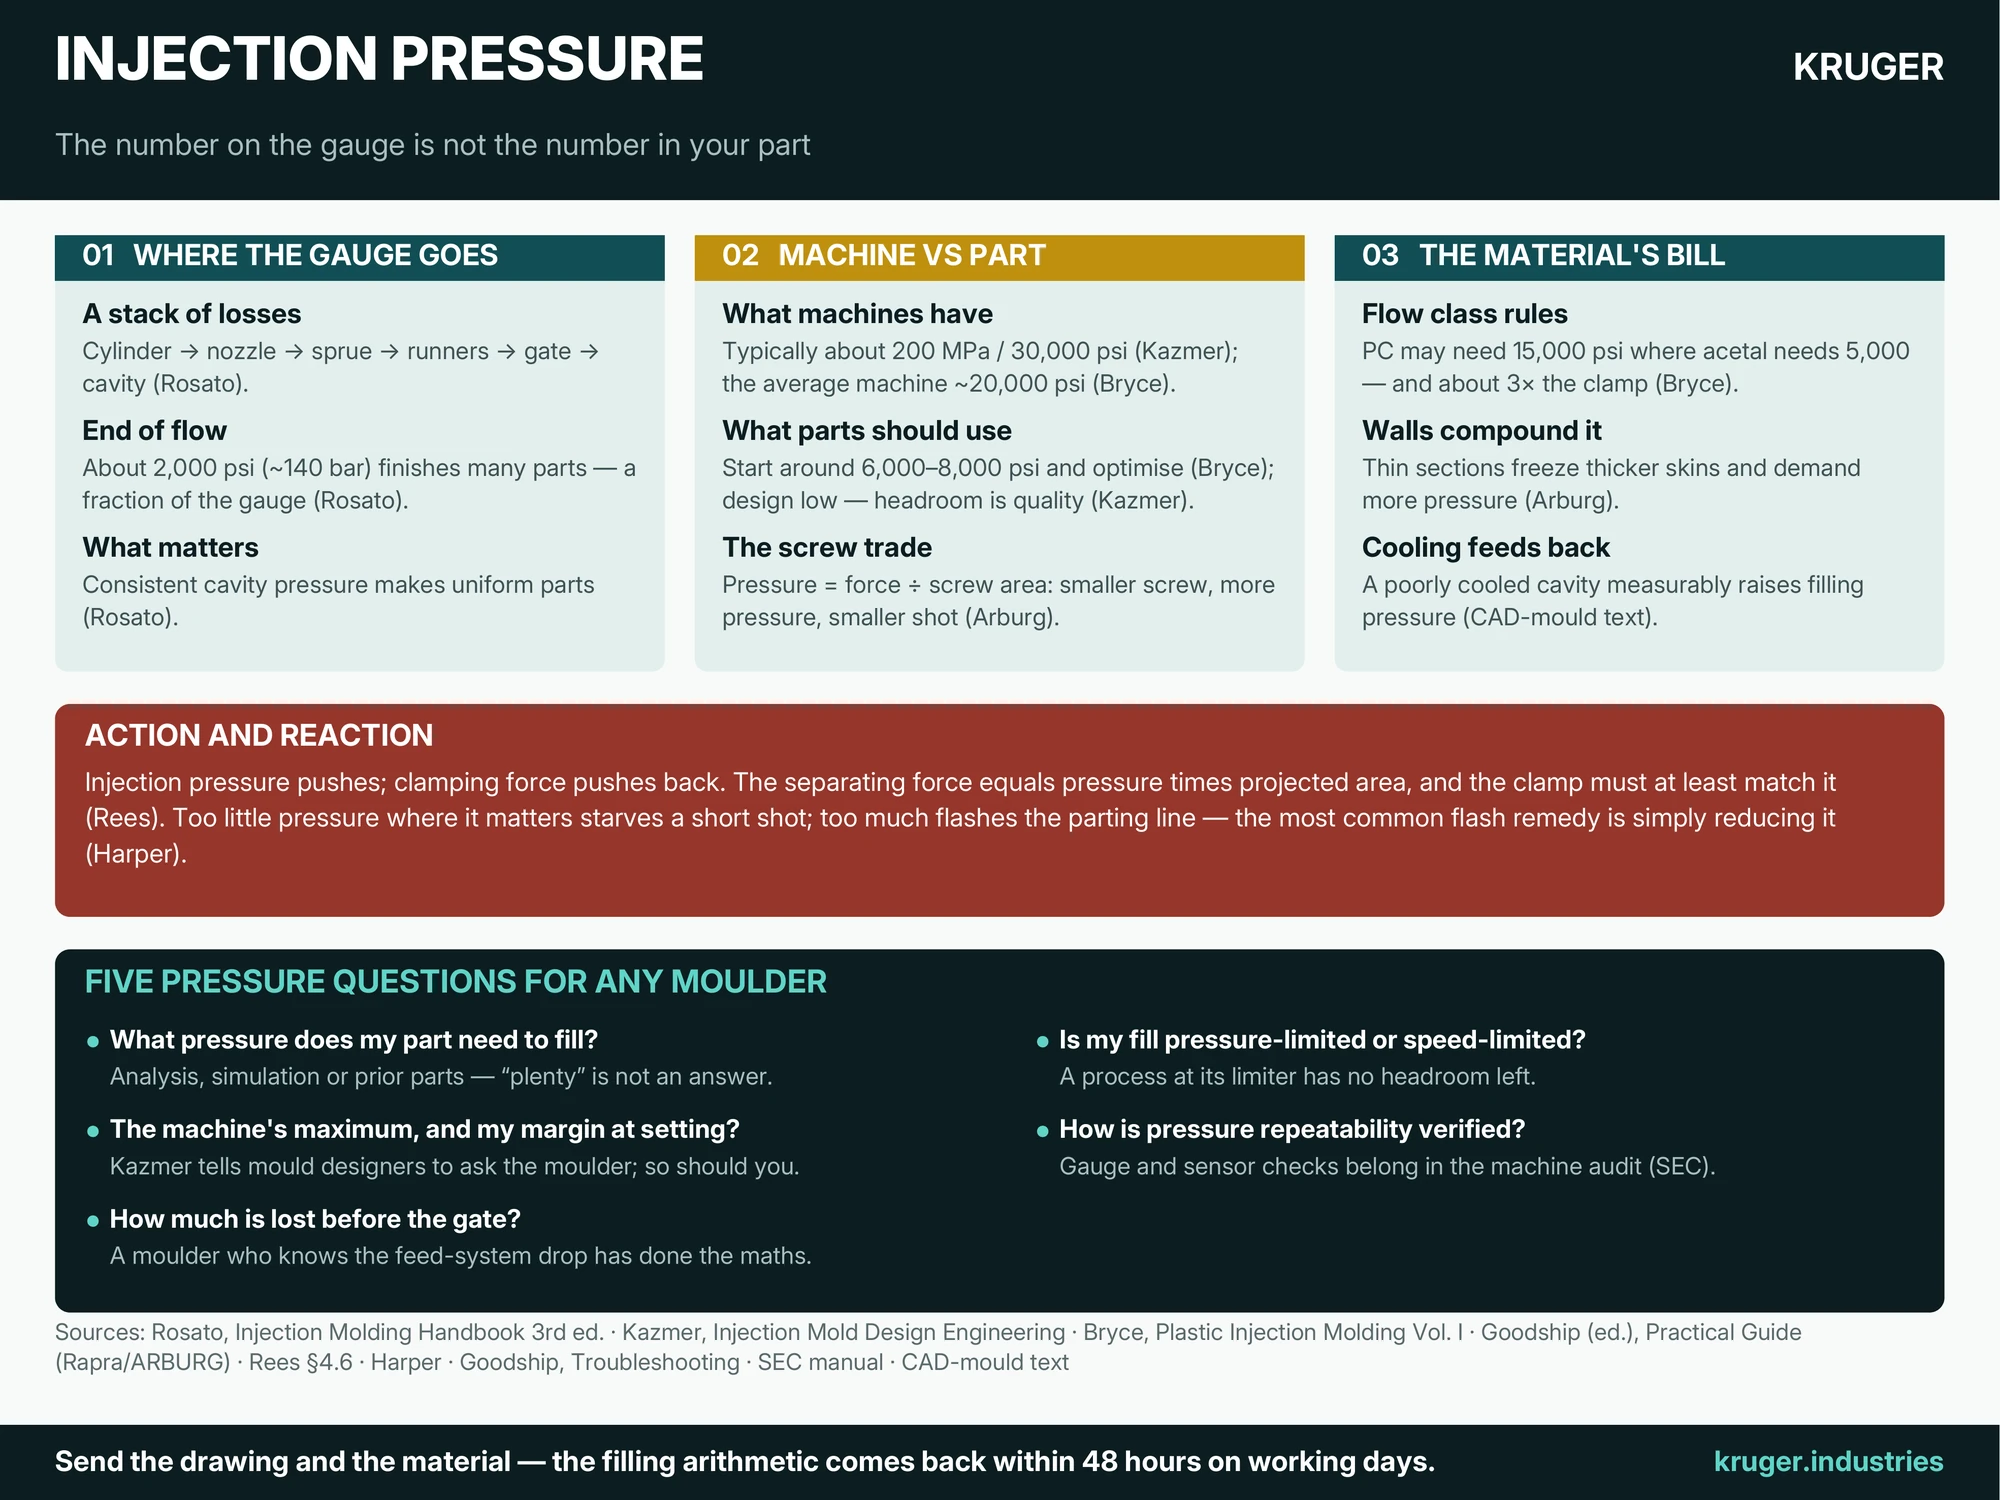
Every moulding machine advertises an impressive injection pressure, and almost none of it reaches your part. Rosato’s handbook takes the reading apart: the figure on the machine’s gauge “is a pressure that is composed of several incremental pressure drops — within the heating cylinder, through the nozzle, through the sprue bushing and runners, through the gate, and then through the cavity”. By the end of the flow path, the pressure actually finishing your part “need only be 2,000 psi for many materials” — about 140 bar — and that can be a small fraction of what the gauge proudly displays. Understanding where the rest went is the fastest way to understand mould filling itself — and to ask a moulder questions that have answers.
How much a machine has — and how much a part should use
Kazmer puts the machine’s side plainly: modern machines “can typically deliver injection pressures of approximately 200 MPa (30,000 psi)”. Bryce’s working figure for the average screw machine is 20,000 psi at the nozzle — with the practical advice that production normally starts around 6,000 to 8,000 psi and is optimised from there. Nobody designs a part to need everything the machine has: Kazmer’s design discipline assumes roughly half the machine’s capability as the cavity-filling ceiling, keeps a further budget aside for the feed system, and prefers erring low, “since it is easier to adjust the molding process for a mold with too low melt pressures than it is to adjust a mold with too high pressures”. The margin is not waste — it is the difference between a process with headroom and a process running against its limiter. And the capability itself is a trade, not a constant: the Arburg guide’s identity, injection pressure = injection force ÷ screw-piston surface, means the same injection unit fitted with a smaller screw delivers more pressure but a smaller shot — one reason the machine guide’s spec sheet has to be read as a set, not a single headline.
The material writes the bill
What a part actually demands is mostly set by material and walls. Bryce’s comparison is the classic: the same product moulded in polycarbonate — a stiff-flowing material — “may require an injection pressure of 15,000 psi”, while in easy-flowing acetal it “may require only 5000 psi”; and because the mould must be held shut against that pressure, the polycarbonate version needs roughly three times the clamp. That is the whole action-and-reaction of moulding in one sentence: injection pressure pushes, clamping force pushes back, and Rees’s mould-design text formalises it — the separating force equals the pressure times the part’s projected area, and the clamp “must be at least as great” or the tool cracks open. Walls compound the bill: the Arburg guide notes that thinner sections freeze a proportionally thicker skin as they fill, raising the pressure required — the same square-law country the wall-thickness guide maps. Even the mould’s cooling layout feeds back: the CAD-mould text records that a poorly cooled cavity measurably raises the injection pressure needed to fill it. Pressure, speed and shear travel together — push melt faster through a small gate and the gate shear-rate calculator will tell you whether the material survives the trip.
When pressure is the symptom
Two of moulding’s most familiar defects are pressure stories told from opposite ends. Too little pressure where it matters and the part starves: the troubleshooting flowcharts walk exactly the sequence you would guess — raise injection speed, then maximum injection pressure — while listing the underlying culprits: trapped air with nowhere to vent, genuinely insufficient pressure, or a feed channel freezing before filling finishes. Too much, and the melt goes where it should not: Harper’s blunt line is that “one of the most common remedies for eliminating flash is to reduce injection pressure”, and the primer’s version is mechanical — flash is what happens when injection pressure pushes the mould open against the clamp. Both symptoms and their cousins live in the defects guide; the machine’s side of holding on lives with the toggle clamp. What separates a disciplined shop is that pressure there is not a feeling: the machine-audit standard our quality-documentation guide describes treats injection pressure as an inspected quantity, checked with gauge and sensor for repeatability — because a machine that cannot repeat its pressure cannot repeat your part. Rosato’s summary deserves its place on the wall: “the consistency of injection pressure in the cavity is an essential element in producing uniform parts.”
Five pressure questions for any moulder
- What pressure does my part need to fill — and how do you know? Analysis, simulation, prior parts in this material: any of these is a real answer. “Plenty” is not.
- What is the machine’s maximum injection pressure, and what margin remains at my part’s setting? Kazmer’s own advice to designers is to ask the moulder for this number — so should you.
- How much pressure is spent in the feed system before the gate? A moulder who knows the drop has done the maths on your tool, not just yours.
- Is my fill limited by pressure or by speed? A process running at the pressure limiter has no headroom — the short-shot flowchart is already half-run.
- How is pressure repeatability verified on the machine? Gauge and sensor checks are part of a proper machine audit — ask when it was last done.
Pressure is where part design, material choice, tool design and machine capability all meet — which is why it is such a good question to ask early. Send the drawing and the material and an engineer replies within 48 hours on working days with the filling arithmetic done — and for the full checklist on judging any moulder, take the supplier-qualification guide.